Keeping up with today’s technology is both exciting and demanding. My passion for home labs started many years ago, and while my family often jokes about the time and money I spend on self-education, they understand the value of staying ahead in such a fast-moving field. What started as curiosity has grown into a journey of building cost-effective supercomputers for edge AI and virtualization.
History of my home LABs
I’ve always been passionate about building labs and experimenting with new technologies. Of course, my family sometimes gets frustrated with the time and money I pour into self-education – but they also know it’s part of who I am. And in today’s world, staying current with technology is a real challenge, both in terms of time and budget.
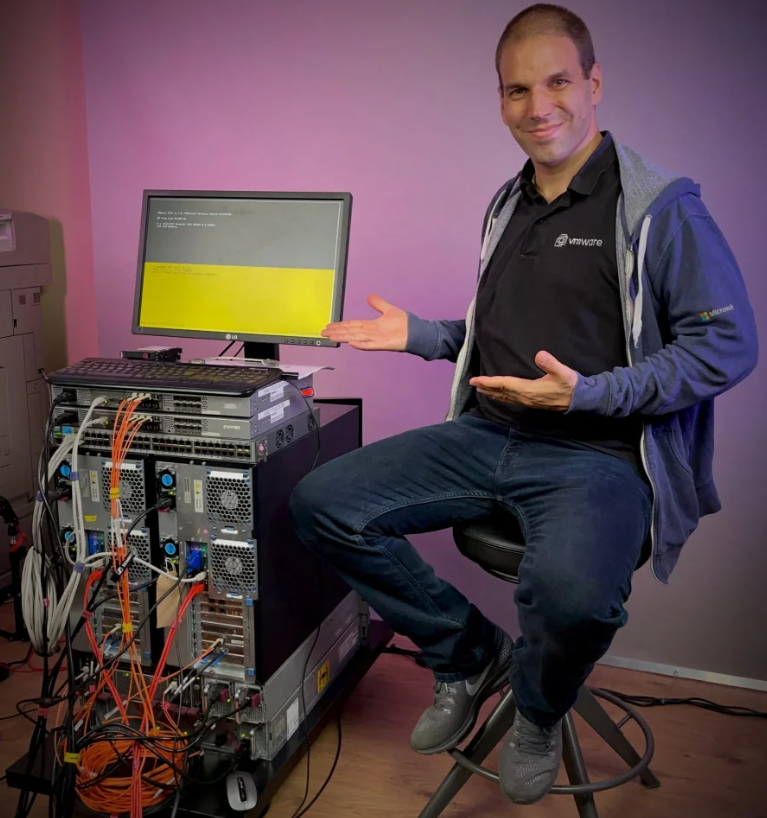
During my years at VMware, I had the privilege of building labs together with hardware vendors – without draining my own wallet. The highlight was probably the vBlock lab at the Cisco office in Budapest, powered by VMware software, Cisco blades, and EMC storage.
Over time, I realized setups like that were the equivalent of today’s quantum computers – powerful, but completely out of reach for most individuals. That insight led me to start blogging about budget-friendly, achievable configurations that everyday enthusiasts can actually build.
~16 Years Ago – Running Server-Class Hardware at Home
Even before I joined VMware in 2009, I was already running labs at home on enterprise-grade gear rescued from my former hosting company. My main setup featured HP and Dell servers powered by Intel X5660 CPUs (2 × 6 cores, 12 threads) with 18 × 8 GB DDR3 RAM.
At the time, I was working at Virtual Instruments and deeply passionate about Infrastructure Performance Management. That meant I also needed a proper SAN fabric at home – dual fabrics (SAN A and SAN B), just like in the enterprise world. It was a blast configuring a Brocade switch for single-initiator zoning. Those were the good old EMC office days, when setting up Fibre Channel zoning felt as exciting as solving a puzzle.
While the setup was powerful, it was also noisy and energy-hungry. Eventually, I realized I needed something more practical – hardware that offered lower power consumption and the ability to hibernate the entire nested-virtualized datacenter when not in use. That realization pushed me toward desktop-class supercomputers in the years ahead.
~5 Years Ago – Transition to a Desktop Supercomputer
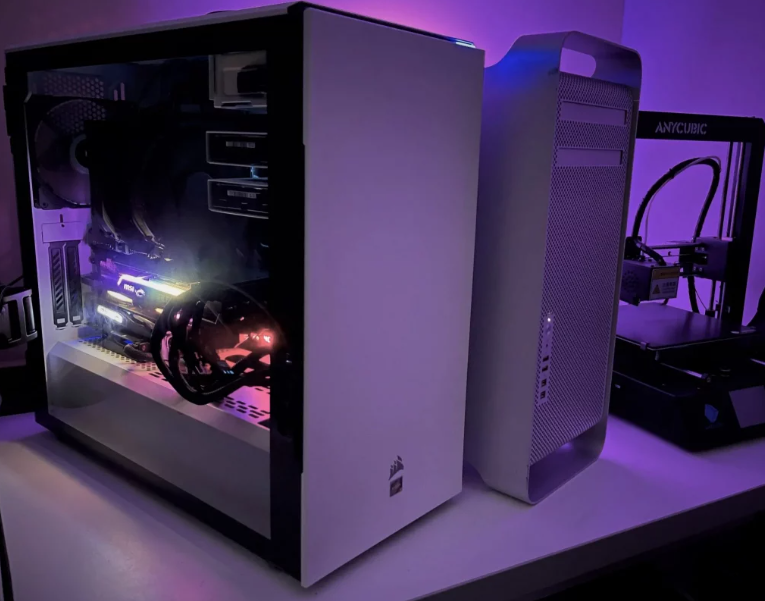
About five years ago, I shifted from bulky enterprise servers to a desktop-class supercomputer. At that time, my main motivation wasn’t AI – it was hardware-accelerated video editing in DaVinci Resolve. I invested in an RTX 2070 Super, aiming to handle demanding multi-camera edits and build an online IT creator presence.
But life had other plans. With the birth of my sons, Attila and later Levente, my priorities shifted. Instead of spending countless hours on post-production, I happily redirected my focus to family. The powerful desktop remained in service, but its role evolved – from a video-editing machine to the foundation for my next-generation home lab.
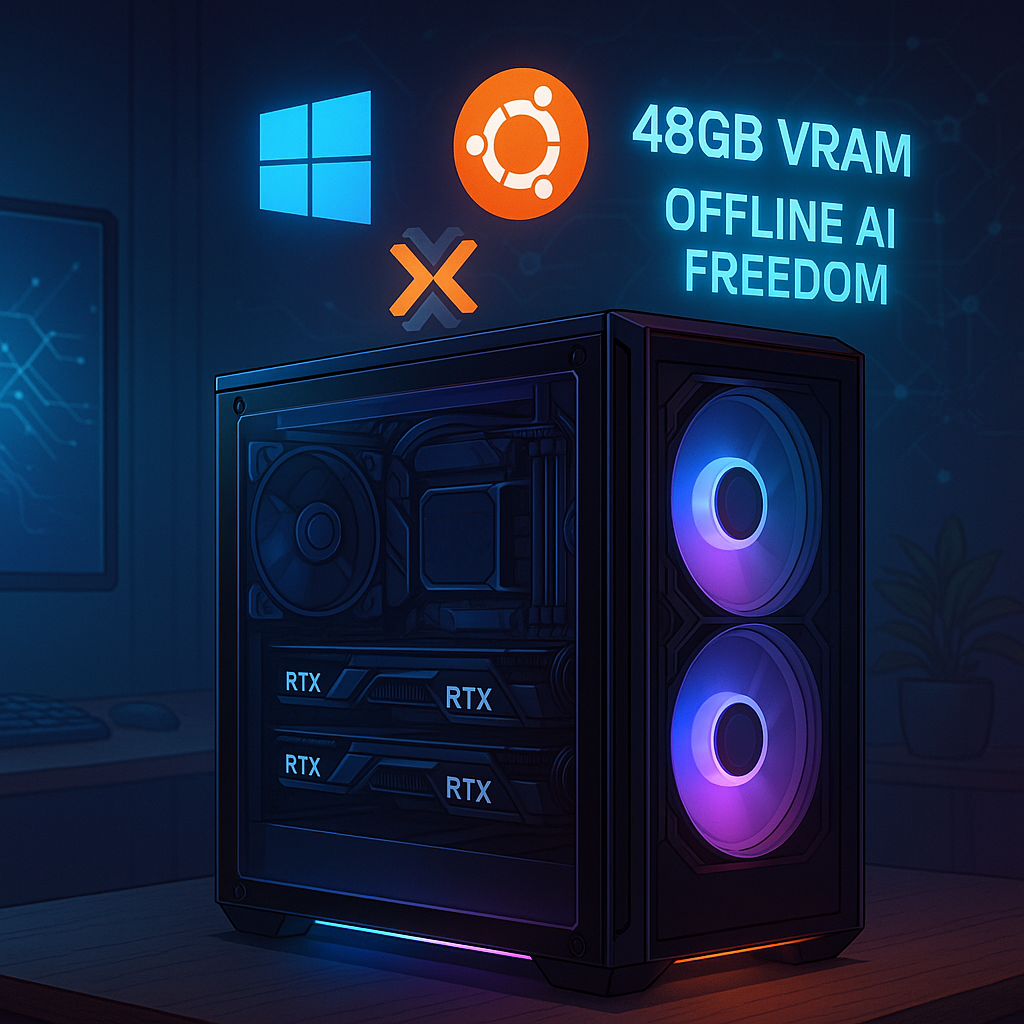
September 2025 – Expanding to 48 GB of Shared GPU Memory
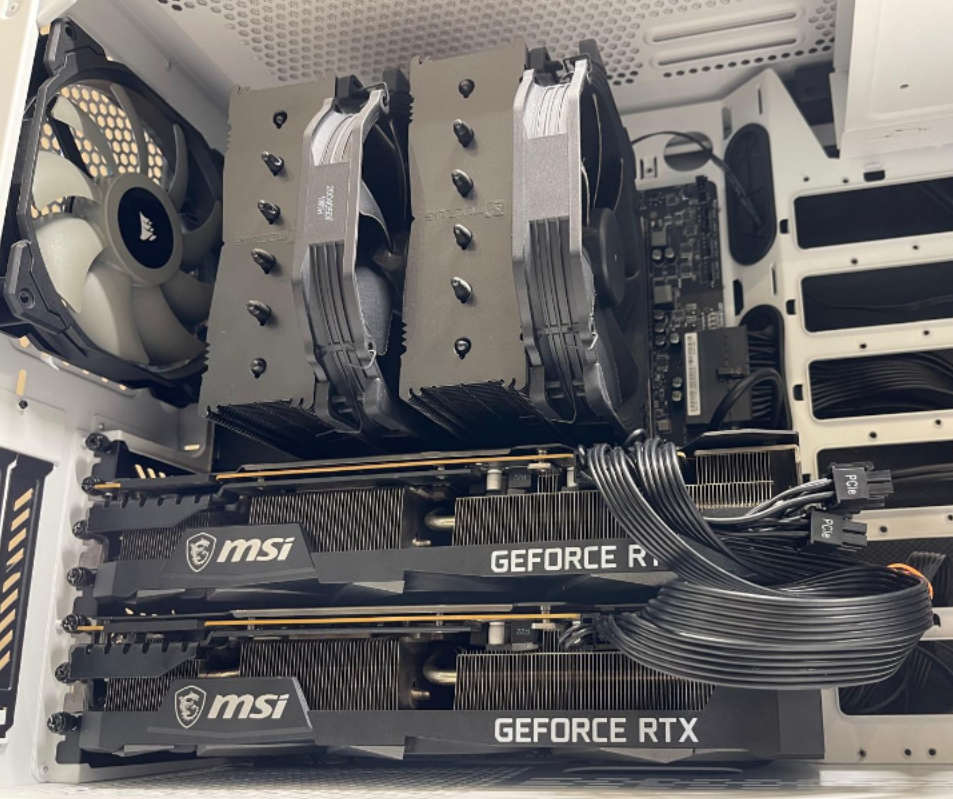
To keep pace with modern workloads, I upgraded my workstation with 2 × RTX 3090 GPUs (2 × 24 GB, 48 GB total VRAM). Open-source AI models are notoriously VRAM-hungry, and while NVIDIA’s flagship RTX 5090s are tempting, I see them as a poor investment with the upcoming GB10 architecture around the corner. My plan is to use this setup as a temporary but powerful solution until I can afford GPUs offering 128+ GB of shared memory, capable of hosting even the largest OSS AI models.
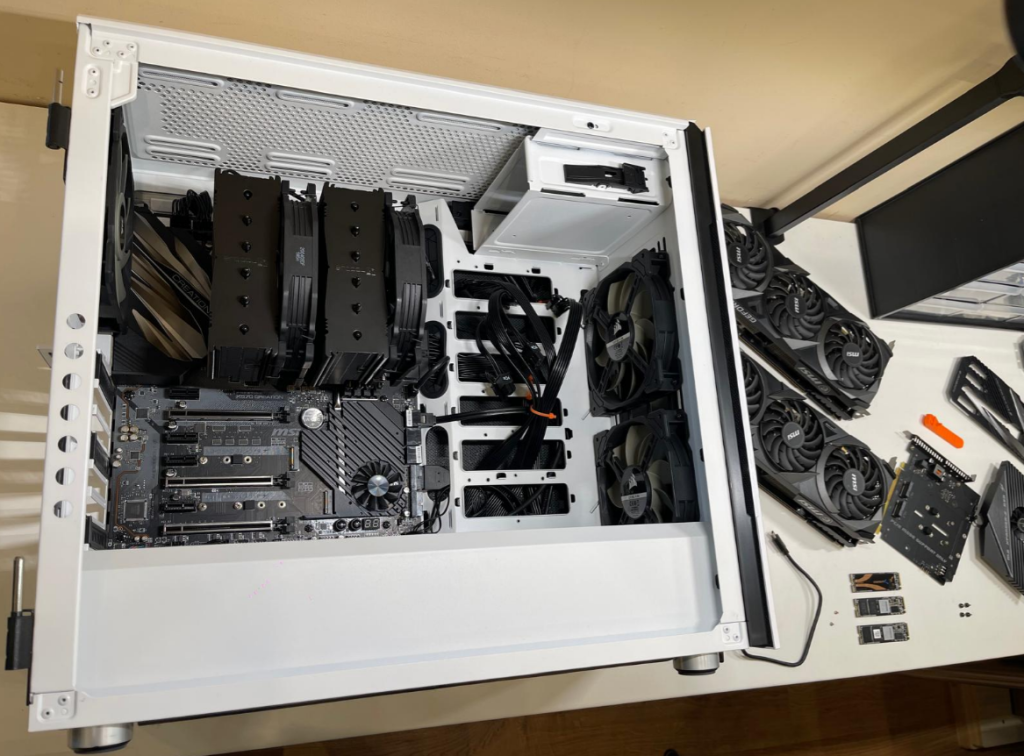
Integrating dual RTX 3090s wasn’t trivial. The GPUs required more power, so I upgraded my PSU from 1000W to 1200W to supply enough PCIe connectors. Physical space is also a challenge: removing or swapping an NVMe drive means carefully sliding out the massive GPU closest to the CPU – a task that demands patience and steady hands to avoid damaging expensive components.
Storage posed another puzzle. With all PCIe slots blocked by GPUs, NVMe expansion cards weren’t an option. While SATA SSDs could have worked, their performance lags far behind NVMe speeds. The solution was to adopt an external USB 3.x NVMe enclosure, providing additional storage for Proxmox, AI VMs, and other lab workloads.
Local storage options for LAB AI Supercomputer
Mainboard NVMe – Fastest Native Option
- Connector/Disk: M.2 NVMe SSDs, PCIe Gen4 ×4 (or Gen5 on newer boards)
- Speed Range: Gen4 drives deliver 5–7 GB/s; Gen5 models can exceed 10 GB/s
- Why It Matters: Direct-to-CPU or chipset connection means ultra-low latency and maximum bandwidth. Ideal for AI model training, high-I/O VMs, and heavy workloads.
PCIe NVMe Extension Card – Almost Native Speeds
- Connector/Disk: PCIe card with M.2 NVMe slots
- Speed Range: Similar to mainboard slots, 5–7 GB/s (Gen4) and higher with Gen5
- Why It Matters: Great for expanding storage without losing performance—if you have free PCIe lanes. The challenge is physical space when large GPUs block available slots.
External NVMe via USB/Thunderbolt – Flexible Compromise
- Connector/Disk: USB 3.2/Thunderbolt enclosures using standard M.2 NVMe drives
- Speed Range:
- USB 3.2 Gen2 (10 Gbps): 800–1,000 MB/s
- USB 3.2 Gen2x2 (20 Gbps): 1.6–2 GB/s
- Thunderbolt 3/4: up to 2.5–3 GB/s
- Why It Matters: Portable, flexible, and hot-swappable. Slower than native PCIe but much faster than SATA. Excellent option when GPUs block PCIe slots.
SATA SSD – Reliable but Limited
- Connector/Disk: 2.5″ SATA SSD or M.2 SATA (AHCI protocol)
- Speed Range: 500–550 MB/s max (6 Gbps interface cap)
- Why It Matters: Affordable and dependable for bulk storage, media, and light VMs, but nowhere near fast enough for modern AI workloads.
Performance Gain in Perspective
Each step up delivers a noticeable boost:
- SATA SSD → USB NVMe: 2–4× faster
- USB NVMe → Mainboard/PCIe NVMe: 3–5× faster
- Mainboard Gen4 → Gen5 NVMe: nearly double in some cases
For an AI-focused lab, the clear winners are mainboard NVMe slots and PCIe extension cards – with external NVMe enclosures serving as the best fallback when expansion space runs out.
Final config
🖥️ Core System
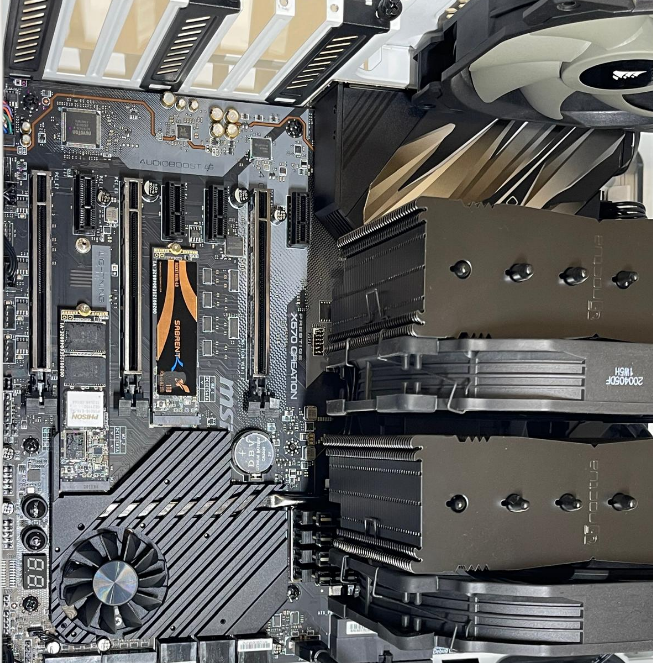
- Motherboard: MSI Prestige X570 Creation
- CPU: AMD Ryzen 9 3900XT (12 cores / 24 threads, 4.7 GHz boost)
- RAM: 128 GB (4 × 32 GB) Corsair Vengeance LPX DDR4-3200
- Sound: Creative Sound BlasterX AE-5 Plus
🎮 GPU Setup
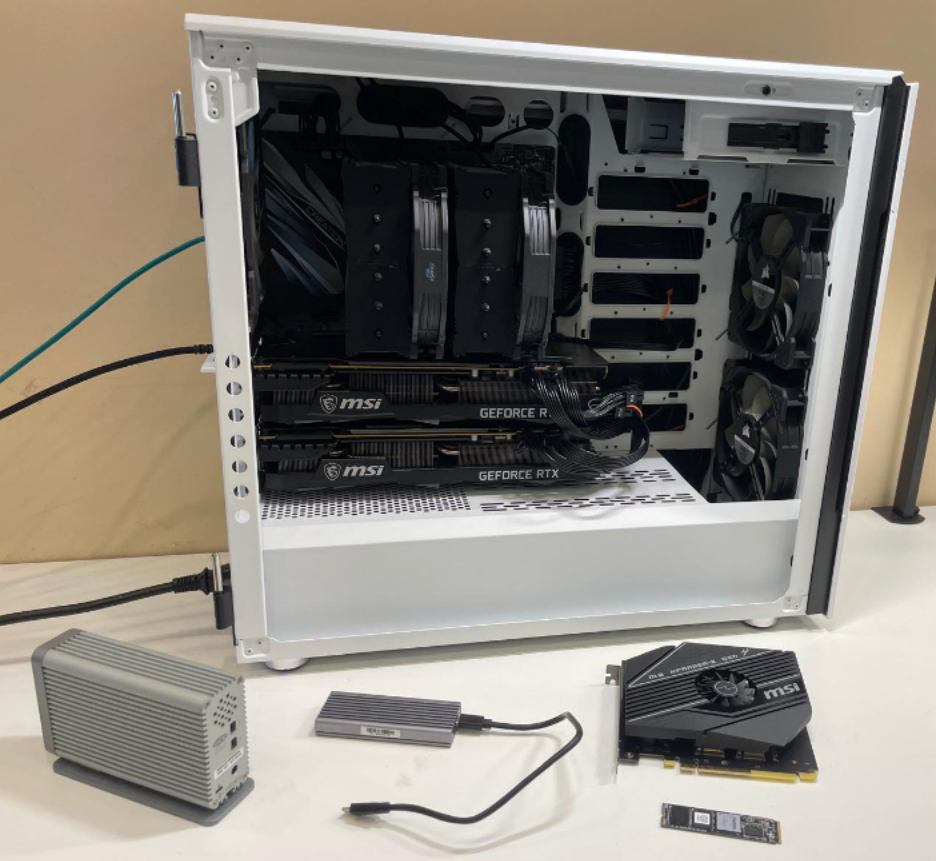
- 2 × NVIDIA RTX 3090 MSI Ventus (24 GB VRAM each → 48 GB total)
💾 Storage
- Primary NVMe: Corsair MP600 Pro LPX 2 TB (PCIe 4.0, ~7000 MB/s) → Windows 11
- Secondary NVMe (onboard SSD): Ubuntu 24.04.3 LTS (dual-boot with Win11)
- Proxmox NVMe (planned): another NVMe drive (triple-boot with Win11 + Ubuntu)
- Extra NVMe drives available:
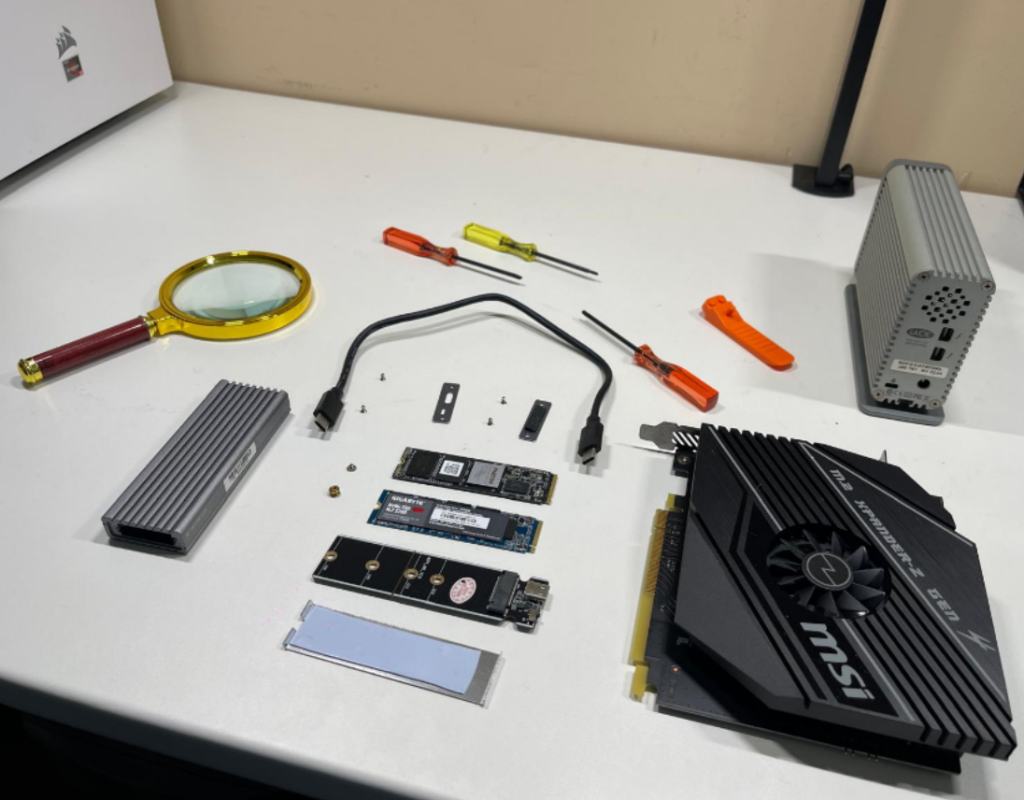
- Gigabyte GP-GSM2NE3512GNTD (512 GB, PCIe 3.0, DRAM-less)
- Phison PS5016-E16 (500 GB, PCIe 4.0)
📀 Expansion Options
- MSI M.2 XPANDER-Z Gen4 → lets you run 2× NVMe drives at full PCIe Gen4 x4 bandwidth ~7000 MB/s (inside system, max performance for AI datasets).
- Icy Box IB-1817M-C31 USB enclosure → limits NVMe speed to ~1000 MB/s (USB 3.1 bottleneck).
- Thunderbolt Add-In Card (optional) → would give you ~2800–3000 MB/s external NVMe speed, but still less than PCIe direct.
🔧 Boot / OS Layout
- Windows 11 → Corsair 2 TB NVMe (main drive)
- Ubuntu 24.04.3 LTS → separate NVMe SSD
- Proxmox VE (planned) → second NVMe for virtualization, with passthrough of the two RTX 3090s
✅ In summary:
You now have a monster workstation / AI lab machine with:
- Ryzen 9 3900XT + 128 GB RAM
- 2× RTX 3090 + 1× RTX 2070
- 2 TB Gen4 NVMe + multiple additional NVMe SSDs (expandable with XPANDER-Z)
- Windows 11, Ubuntu, and Proxmox triple-boot setup
What’s next – Software Stack – Triple-Boot, Dual-GPU, and Full Control: My Path to On-Prem AI
As time permits, I’ll publish a dedicated article describing how I set up a triple-boot environment: Windows 11 on the primary NVMe for daily work and gaming, Ubuntu 24.04 LTS on the secondary SSD for open-source workflows and direct AI experimentation, and Proxmox VE on NVMe to host virtualized labs and AI workloads. This layout gives me the best of all worlds – Windows for compatibility, Ubuntu for native GPU acceleration, and Proxmox for a full nested datacenter experience.
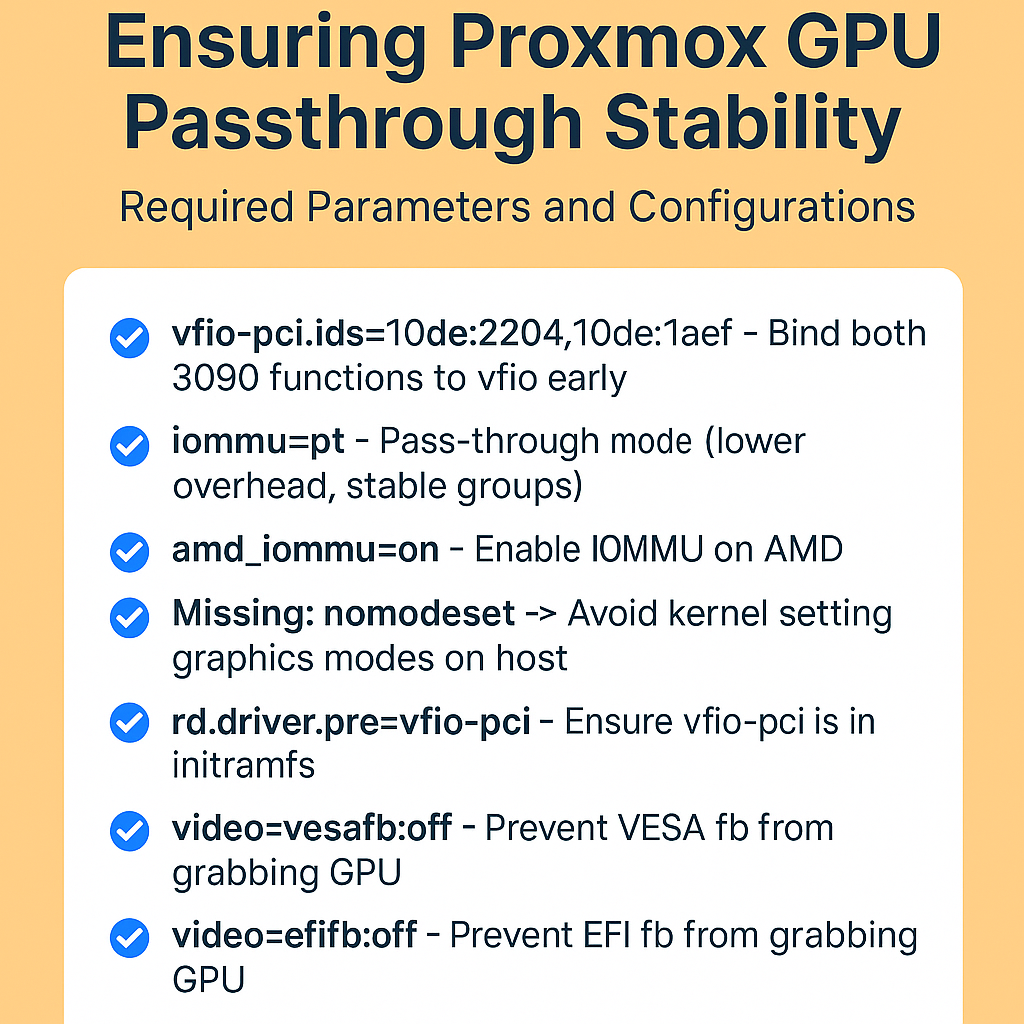
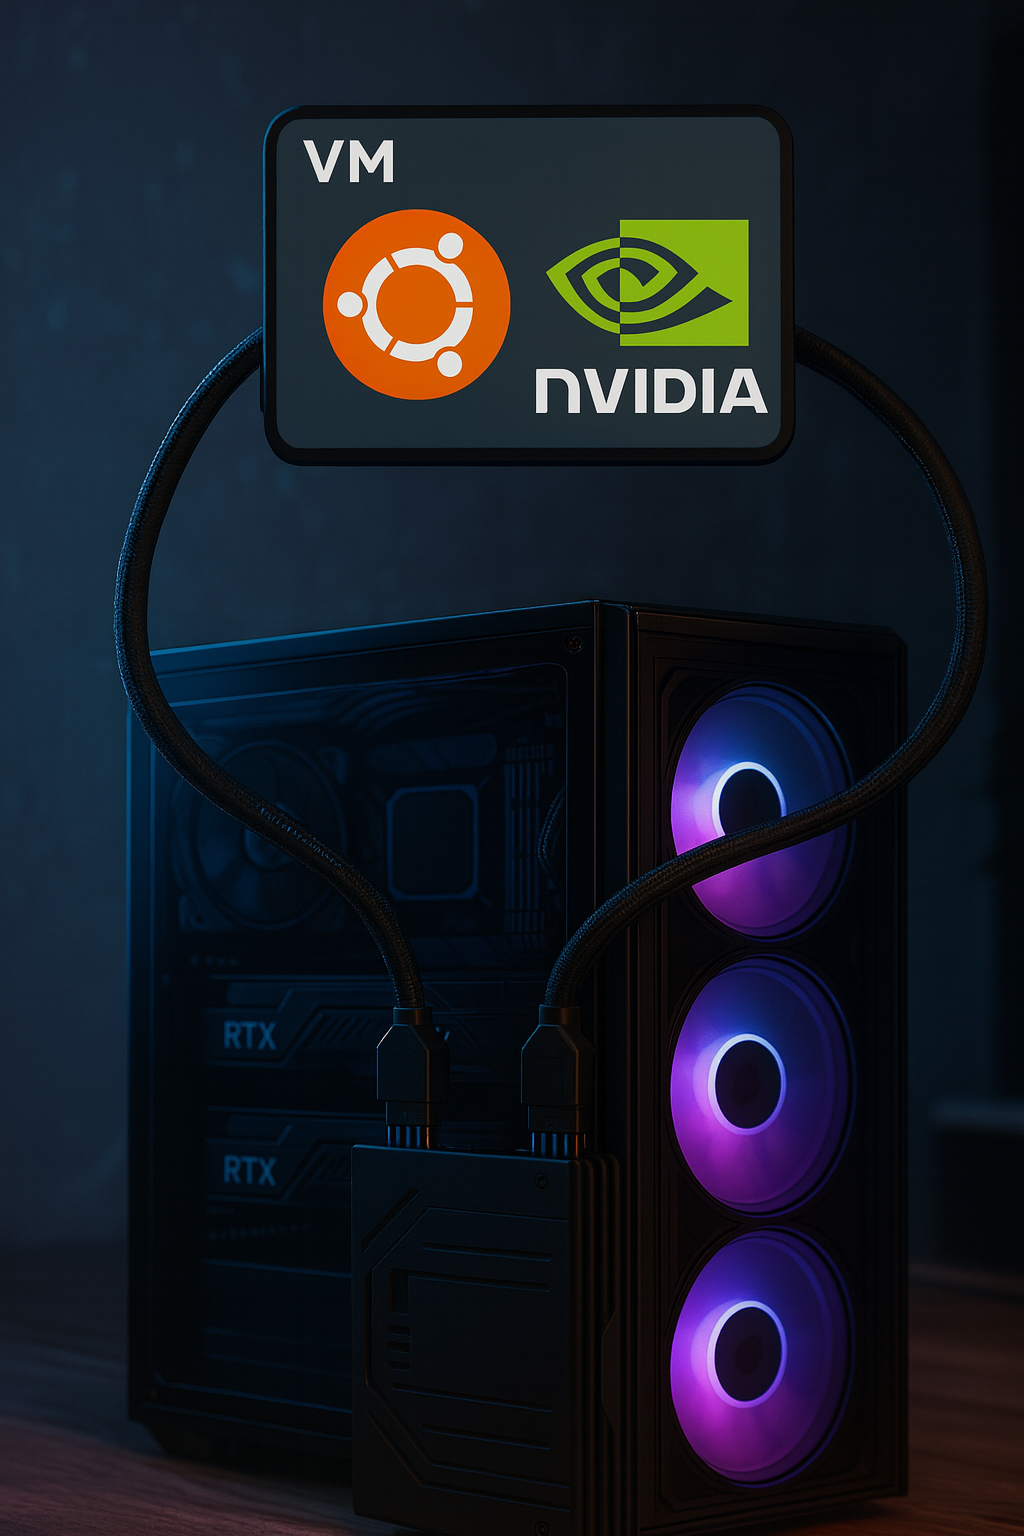
On top of that, I configured GPU passthrough in Proxmox, assigning both RTX 3090 GPUs to an Ubuntu VM. This setup lets me run mid-size open-source AI models fully on-prem, making use of the 48 GB of combined VRAM without depending on external services. I can train, fine-tune, and experiment at home with low latency and full control.
Why go through all this effort? Because running AI offline provides both privacy and independence. Even if you pay for cloud AI services, you’re never entirely sure how much of your prompts and data are retained. With my setup, nothing leaves my lab. I can explore, experiment, and even break things – without worrying about who’s watching. It’s about having unlimited fun with AI on my own terms, powered by hardware I own and trust.

Thank you, AI, for assisting me with this blog article.