I built on my edge AI hardware by adding Proxmox VE as the virtualization layer. After prepping BIOS, using Rufus with the nomodeset trick, and installing Proxmox, I enabled IOMMU, configured VFIO, and passed through 2× RTX 3090 GPUs to a single Ubuntu VM. This setup lets me run private AI workloads at near bare-metal speed, while keeping Windows and native Ubuntu for special use cases.
In my previous post, Building the Perfect Edge AI Supercomputer – Cost Effective Hardware, I focused on the hardware. In this follow‑up I’ll show the exact steps I used to layer Proxmox VE on top and pass two RTX 3090 GPUs through to a single Ubuntu VM. The goal is a repeatable journey anyone can follow.
What You’ll Build
Host OS: Proxmox VE on a dedicated NVMe (ext4)
Triple‑boot plan: Windows 11 (video editing & the odd game with my boys), native Ubuntu (raw performance), and Proxmox (daily driver for labs).
AI VM: One big Ubuntu VM with 2× RTX 3090 via PCIe passthrough
Use case: Private, offline edge AI with maximum flexibility for lab VMs alongside
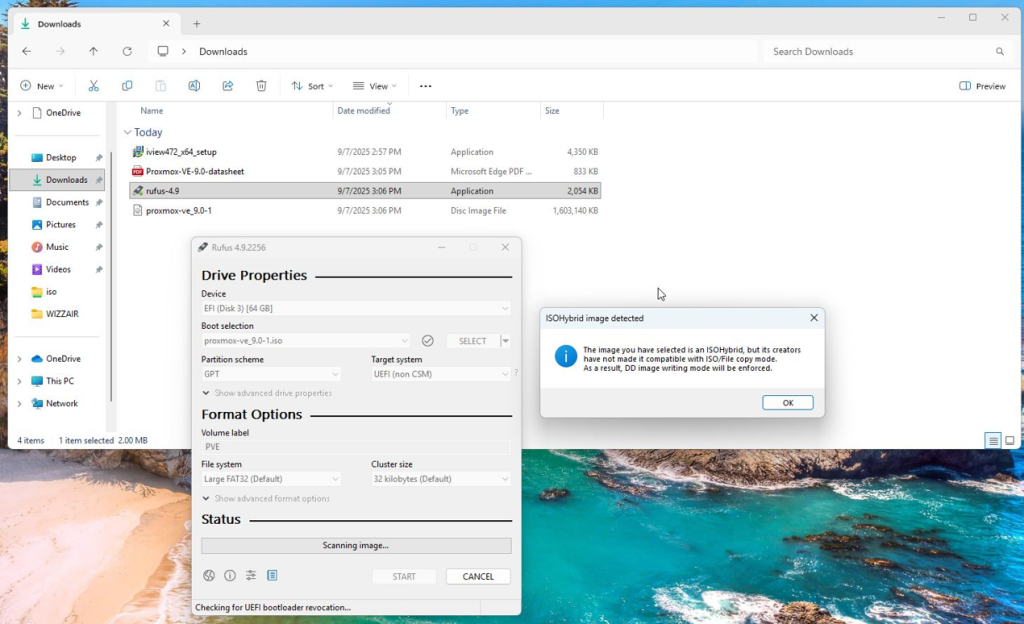
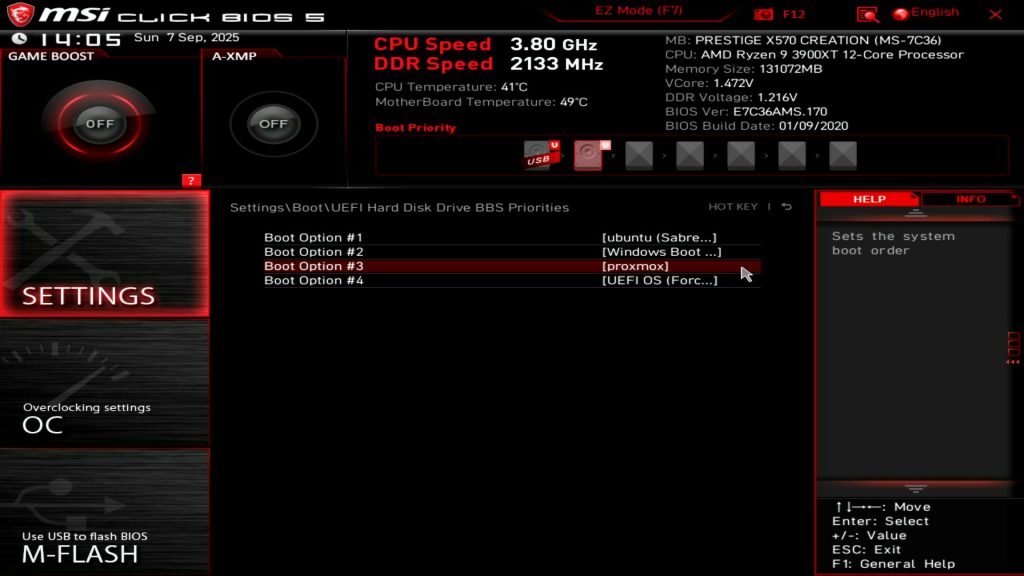
Tip: I prepared the installer USB with Rufus. During boot I used the nomodeset trick (press e at the boot menu, add nomodeset to the kernel line) so the machine wouldn’t hang on the GPU while booting the installer from USB.
Why Proxmox (and not Hyper-V/WSL2 or vSphere)?
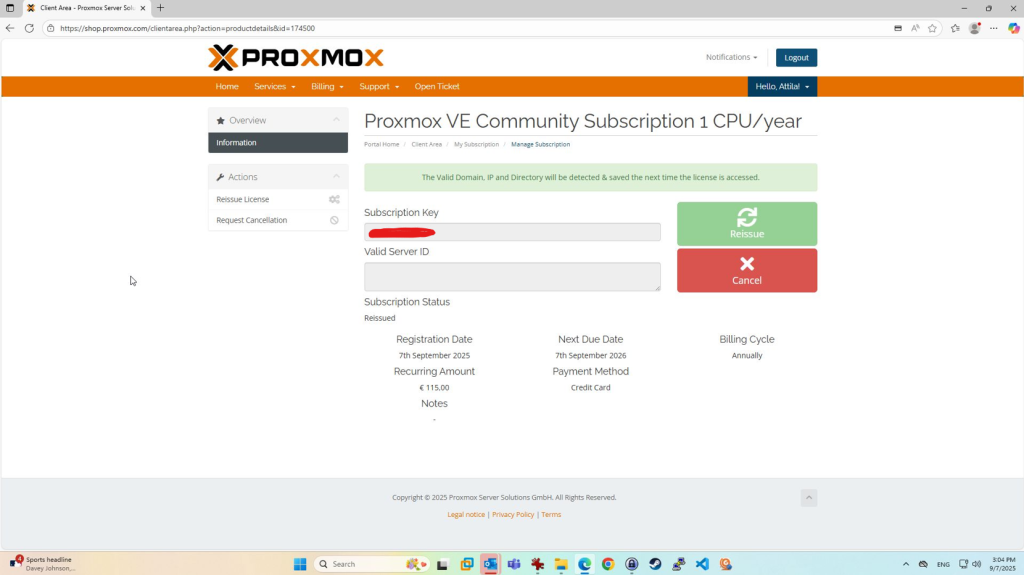
I already run Proxmox on another server, and for 115 EUR/year the subscription feels like a fair deal for a bare-metal hypervisor that rivals vSphere (formerly ESXi, back when it was still free for home use).
Unfortunately, Broadcom’s new direction means VMware enthusiasts like me can’t really continue with vSphere the way we used to, and a VMUG membership still costs more.
A note to Broadcom/VMware: thanks for the amazing five years of employment and for shaping much of my understanding of enterprise virtualization.
Hyper-V? No thanks. I had enough of it during my time at Microsoft. And while WSL2* is technically an option, it’s built on Hyper-V and GPU passthrough might work, but my gut says performance won’t be on par. Maybe one day I’ll run benchmarks to confirm, but for now, Proxmox is the clear choice.
* What is Windows Subsystem for Linux | Microsoft Learn
A note to Microsoft: I’m equally grateful for my seven years there – five wonderful years with hosting and service providers, followed by two more. Even today, I still keep an eye on where it’s heading and occasionally use it in Windows 11 and Server 2025. Tools like Windows Admin Center and Azure ARC remain part of my toolbox.
1) Install Proxmox VE
- Create a USB installer with Rufus (GPT + UEFI).
- Boot the installer; if you get a black screen, press
eand addnomodesetto the kernel args. - Choose ext4 (simple & robust) and install Proxmox on a dedicated NVMe (e.g.,
/dev/nvme1n1). - Give Proxmox a static management IP.
- Reboot into Proxmox.
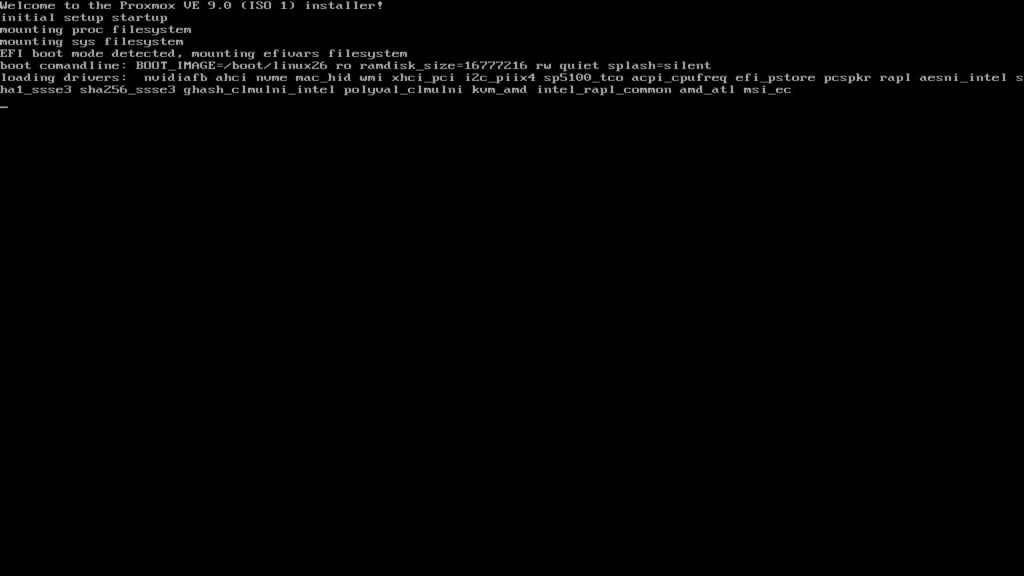
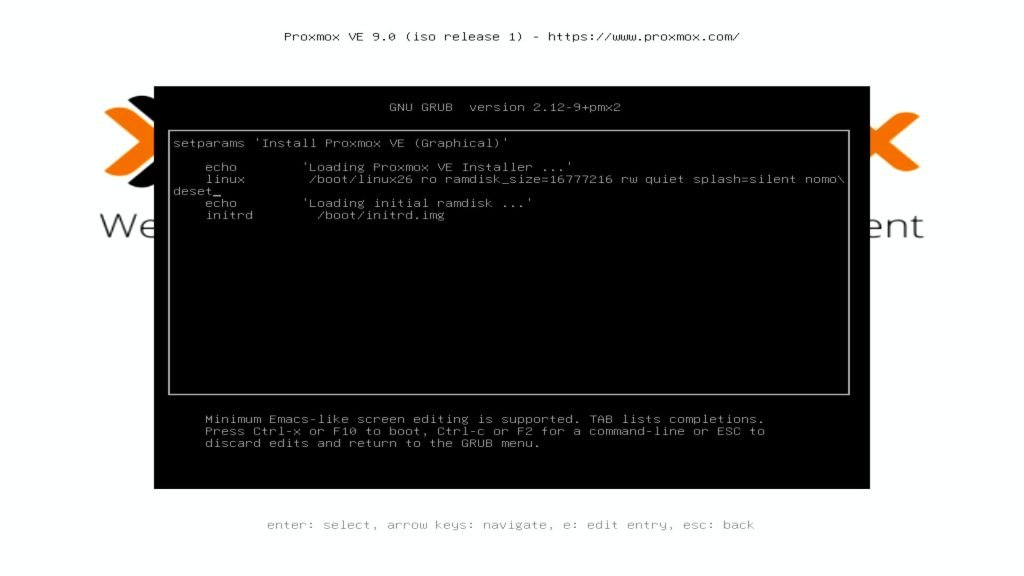
e at the boot menu, append nomodeset to the kernel arguments, and the system will boot cleanly.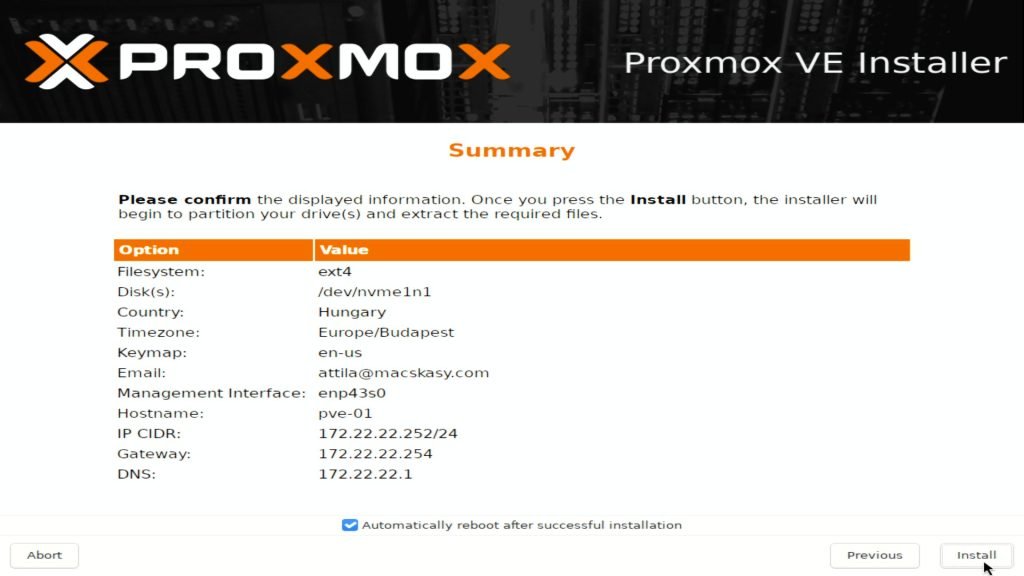
Post‑install (shell)
apt update && apt -y full-upgrade(Optional) enable the no‑subscription repo for updates if you don’t use a sub:
sed -i 's/^deb/#deb/g' /etc/apt/sources.list.d/pve-enterprise.list
cat >/etc/apt/sources.list.d/pve-no-subscription.list <<'EOF'
deb http://download.proxmox.com/debian/pve bookworm pve-no-subscription
EOF
apt update && apt -y upgrade
2) Enable IOMMU on the Host
Edit /etc/default/grub and append the right flag to GRUB_CMDLINE_LINUX_DEFAULT:
- AMD:
amd_iommu=on - Intel:
intel_iommu=on
Example (AMD):
GRUB_CMDLINE_LINUX_DEFAULT="quiet amd_iommu=on"

update-grub

reboot
Verify after reboot:
root@pve-01:~# dmesg | egrep -i "iommu|amd-vi|intel-iommu"
[    0.000000] Command line: BOOT_IMAGE=/boot/vmlinuz-6.14.8-2-pve root=/dev/mapper/pve-root ro nomodeset quiet amd_iommu=on
[    0.000000] Kernel command line: BOOT_IMAGE=/boot/vmlinuz-6.14.8-2-pve root=/dev/mapper/pve-root ro nomodeset quiet amd_iommu=on
[    0.000000] AMD-Vi: Unknown option - 'on'
[    0.000000] AMD-Vi: Using global IVHD EFR:0x58f77ef22294ade, EFR2:0x0
[    0.267301] iommu: Default domain type: Translated
[    0.267301] iommu: DMA domain TLB invalidation policy: lazy mode
[    0.300624] pci 0000:00:00.2: AMD-Vi: IOMMU performance counters supported
[    0.300723] pci 0000:00:00.0: Adding to iommu group 0
[    0.300766] pci 0000:00:01.0: Adding to iommu group 1

... BLA BLA BLA ...

[    0.303223] pci 0000:35:00.0: Adding to iommu group 45
[    0.303249] pci 0000:36:00.0: Adding to iommu group 46
[    0.309178] AMD-Vi: Extended features (0x58f77ef22294ade, 0x0): PPR X2APIC NX GT IA GA PC GA_vAPIC
[    0.309195] AMD-Vi: Interrupt remapping enabled
[    0.309197] AMD-Vi: X2APIC enabled
[    0.309444] AMD-Vi: Virtual APIC enabled
[    0.310018] perf/amd_iommu: Detected AMD IOMMU #0 (2 banks, 4 counters/bank).
[    0.349456] iommu ivhd0: AMD-Vi: Event logged [INVALID_DEVICE_REQUEST device=0000:00:00.0 pasid=0x00000 address=0xfffffffdf8000000 flags=0x0a00]
root@pve-01:~#
You should see lines confirming IOMMU is enabled.
3) Load VFIO Modules & Keep NVIDIA Off the Host
Load VFIO at boot:
cat >/etc/modules <<'EOF'
vfio
vfio_pci
vfio_iommu_type1
vfio_virqfd
EOF
Blacklist host GPU drivers (so Proxmox won’t claim the cards):
cat >/etc/modprobe.d/blacklist-nvidia.conf <<'EOF'
blacklist nouveau
blacklist nvidia
blacklist nvidia_drm
blacklist nvidia_modeset
blacklist nvidiafb
EOF
Find your GPU devices and IDs:
root@pve-01:~# lspci | grep -i nvidia
31:00.0 VGA compatible controller: NVIDIA Corporation GA102 [GeForce RTX 3090] (rev a1)
31:00.1 Audio device: NVIDIA Corporation GA102 High Definition Audio Controller (rev a1)
32:00.0 VGA compatible controller: NVIDIA Corporation GA102 [GeForce RTX 3090] (rev a1)
32:00.1 Audio device: NVIDIA Corporation GA102 High Definition Audio Controller (rev a1)
root@pve-01:~#
lspci -n -s 31:00.0
lspci -n -s 31:00.1
lspci -n -s 32:00.0
lspci -n -s 32:00.1
31:00.0 0300: 10de:2204 (rev a1)
31:00.1 0403: 10de:1aef (rev a1)
32:00.0 0300: 10de:2204 (rev a1)
32:00.1 0403: 10de:1aef (rev a1)
Bind those IDs to VFIO (both GPUs share the same IDs, so list them once):
cat >/etc/modprobe.d/vfio.conf <<'EOF'
options vfio-pci ids=10de:2204,10de:1aef
EOF
Update initramfs and reboot:
update-initramfs -u
reboot
Verify all four functions are using vfio-pci:
root@pve-01:~#
lspci -k -s 31:00.0
lspci -k -s 31:00.1
lspci -k -s 32:00.0
lspci -k -s 32:00.1
31:00.0 VGA compatible controller: NVIDIA Corporation GA102 [GeForce RTX 3090] (rev a1)
        Subsystem: Micro-Star International Co., Ltd. [MSI] Device 3881
        Kernel driver in use: vfio-pci
        Kernel modules: nvidiafb, nouveau
31:00.1 Audio device: NVIDIA Corporation GA102 High Definition Audio Controller (rev a1)
        Subsystem: Micro-Star International Co., Ltd. [MSI] Device 3881
        Kernel driver in use: vfio-pci
        Kernel modules: snd_hda_intel
32:00.0 VGA compatible controller: NVIDIA Corporation GA102 [GeForce RTX 3090] (rev a1)
        Subsystem: Micro-Star International Co., Ltd. [MSI] Device 3881
        Kernel driver in use: vfio-pci
        Kernel modules: nvidiafb, nouveau
32:00.1 Audio device: NVIDIA Corporation GA102 High Definition Audio Controller (rev a1)
        Subsystem: Micro-Star International Co., Ltd. [MSI] Device 3881
        Kernel driver in use: vfio-pci
        Kernel modules: snd_hda_intel
root@pve-01:~#
(Optional) Check IOMMU Groups
If a GPU shares a group with other devices, you may need ACS override (last resort on a lab host):
root@pve-01:~# find /sys/kernel/iommu_groups/ -type l | sort
/sys/kernel/iommu_groups/0/devices/0000:00:00.0
/sys/kernel/iommu_groups/10/devices/0000:00:07.0
/sys/kernel/iommu_groups/11/devices/0000:00:07.1
/sys/kernel/iommu_groups/12/devices/0000:00:08.0
/sys/kernel/iommu_groups/13/devices/0000:00:08.1
/sys/kernel/iommu_groups/14/devices/0000:00:08.2
/sys/kernel/iommu_groups/15/devices/0000:00:08.3
/sys/kernel/iommu_groups/16/devices/0000:00:14.0
/sys/kernel/iommu_groups/16/devices/0000:00:14.3
/sys/kernel/iommu_groups/17/devices/0000:00:18.0
/sys/kernel/iommu_groups/17/devices/0000:00:18.1
/sys/kernel/iommu_groups/17/devices/0000:00:18.2
/sys/kernel/iommu_groups/17/devices/0000:00:18.3
/sys/kernel/iommu_groups/17/devices/0000:00:18.4
/sys/kernel/iommu_groups/17/devices/0000:00:18.5
/sys/kernel/iommu_groups/17/devices/0000:00:18.6
/sys/kernel/iommu_groups/17/devices/0000:00:18.7
/sys/kernel/iommu_groups/18/devices/0000:01:00.0
/sys/kernel/iommu_groups/19/devices/0000:20:00.0
/sys/kernel/iommu_groups/1/devices/0000:00:01.0
/sys/kernel/iommu_groups/20/devices/0000:21:01.0
/sys/kernel/iommu_groups/21/devices/0000:21:02.0
/sys/kernel/iommu_groups/22/devices/0000:21:03.0
/sys/kernel/iommu_groups/23/devices/0000:21:04.0
/sys/kernel/iommu_groups/24/devices/0000:21:05.0
/sys/kernel/iommu_groups/25/devices/0000:21:06.0
/sys/kernel/iommu_groups/26/devices/0000:21:08.0
/sys/kernel/iommu_groups/26/devices/0000:2e:00.0
/sys/kernel/iommu_groups/26/devices/0000:2e:00.1
/sys/kernel/iommu_groups/26/devices/0000:2e:00.3
/sys/kernel/iommu_groups/27/devices/0000:21:09.0
/sys/kernel/iommu_groups/27/devices/0000:2f:00.0
/sys/kernel/iommu_groups/28/devices/0000:21:0a.0
/sys/kernel/iommu_groups/28/devices/0000:30:00.0
/sys/kernel/iommu_groups/29/devices/0000:23:00.0
/sys/kernel/iommu_groups/2/devices/0000:00:01.1
/sys/kernel/iommu_groups/30/devices/0000:24:00.0
/sys/kernel/iommu_groups/31/devices/0000:25:00.0
/sys/kernel/iommu_groups/32/devices/0000:26:01.0
/sys/kernel/iommu_groups/33/devices/0000:26:03.0
/sys/kernel/iommu_groups/34/devices/0000:26:05.0
/sys/kernel/iommu_groups/35/devices/0000:26:07.0
/sys/kernel/iommu_groups/36/devices/0000:2b:00.0
/sys/kernel/iommu_groups/37/devices/0000:2c:00.0
/sys/kernel/iommu_groups/38/devices/0000:2d:00.0
/sys/kernel/iommu_groups/39/devices/0000:31:00.0
/sys/kernel/iommu_groups/39/devices/0000:31:00.1
/sys/kernel/iommu_groups/3/devices/0000:00:01.2
/sys/kernel/iommu_groups/40/devices/0000:32:00.0
/sys/kernel/iommu_groups/40/devices/0000:32:00.1
/sys/kernel/iommu_groups/41/devices/0000:33:00.0
/sys/kernel/iommu_groups/42/devices/0000:34:00.0
/sys/kernel/iommu_groups/43/devices/0000:34:00.3
/sys/kernel/iommu_groups/44/devices/0000:34:00.4
/sys/kernel/iommu_groups/45/devices/0000:35:00.0
/sys/kernel/iommu_groups/46/devices/0000:36:00.0
/sys/kernel/iommu_groups/4/devices/0000:00:02.0
/sys/kernel/iommu_groups/5/devices/0000:00:03.0
/sys/kernel/iommu_groups/6/devices/0000:00:03.1
/sys/kernel/iommu_groups/7/devices/0000:00:03.2
/sys/kernel/iommu_groups/8/devices/0000:00:04.0
/sys/kernel/iommu_groups/9/devices/0000:00:05.0
If the GPUs are not isolated, add to GRUB: pcie_acs_override=downstream,multifunction, then update-grub && reboot.
Security note: ACS override weakens isolation. Use it only on non‑production lab machines.
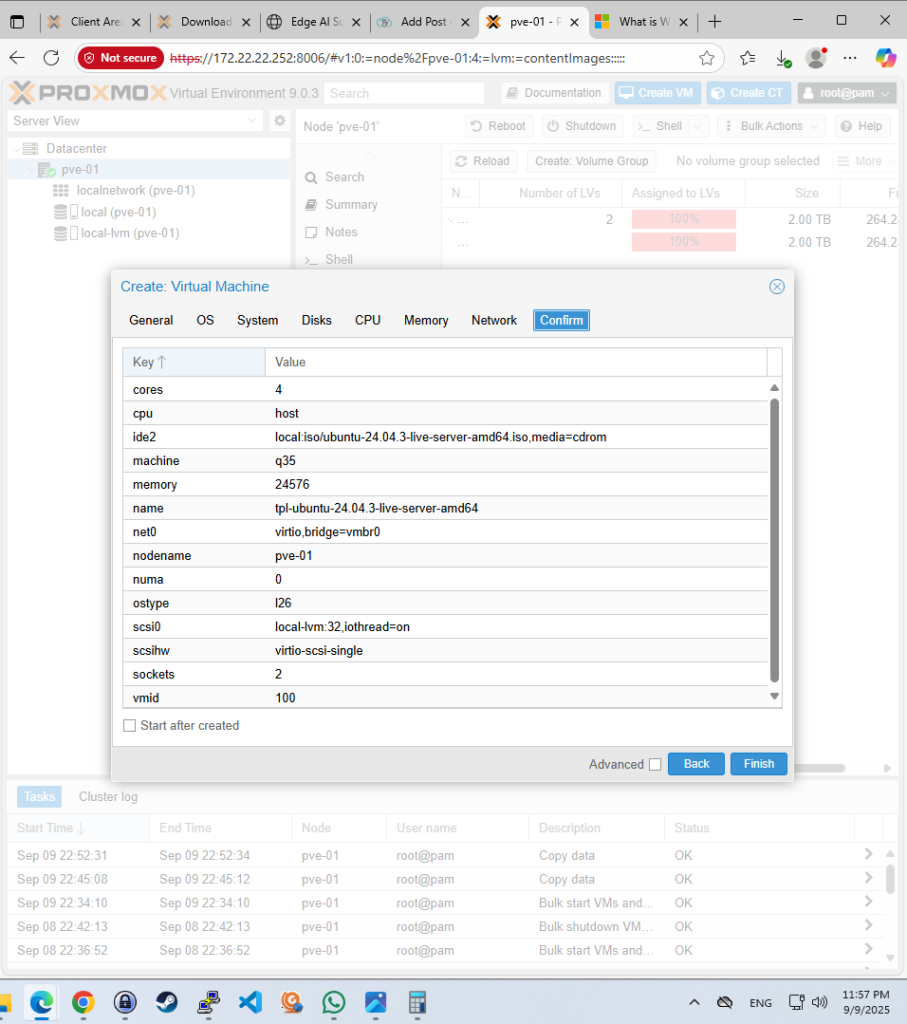
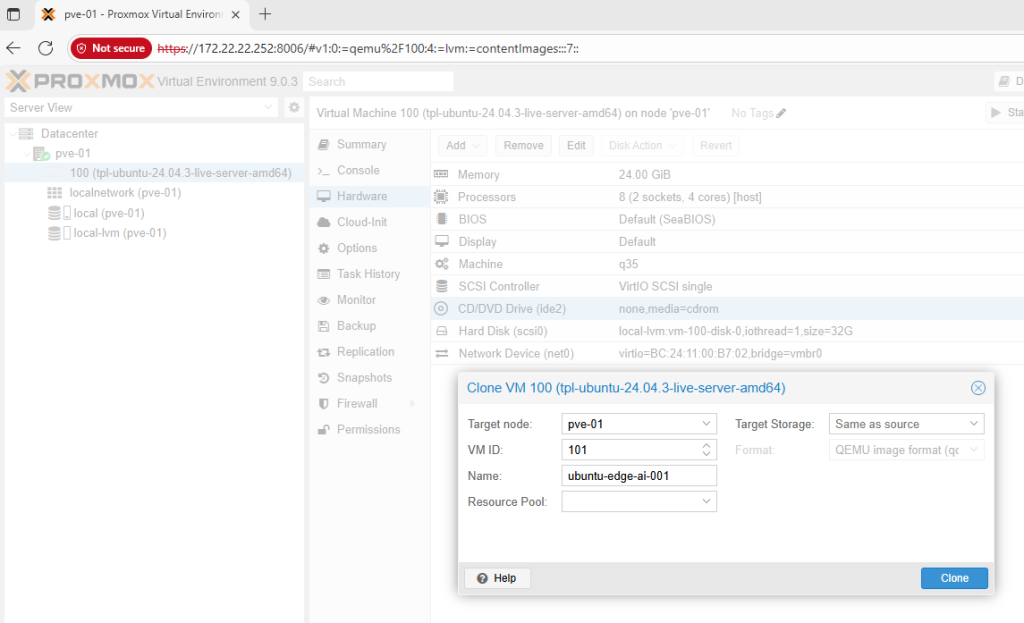
4) Create the AI VM (Ubuntu)
Create a new VM in the Proxmox UI:
- BIOS:
OVMF (UEFI) - Machine:
q35 - Display:
None(or keep VirtIO‑GPU until drivers are installed) - SCSI Controller:
VirtIO SCSI single - Disk: VirtIO SCSI on NVMe storage
- CPU Type:
host(later addhidden=1if you plan Windows guests) - Cores/RAM: as needed (I give the Ubuntu AI VM most of the machine)
- Network: VirtIO paravirtualized
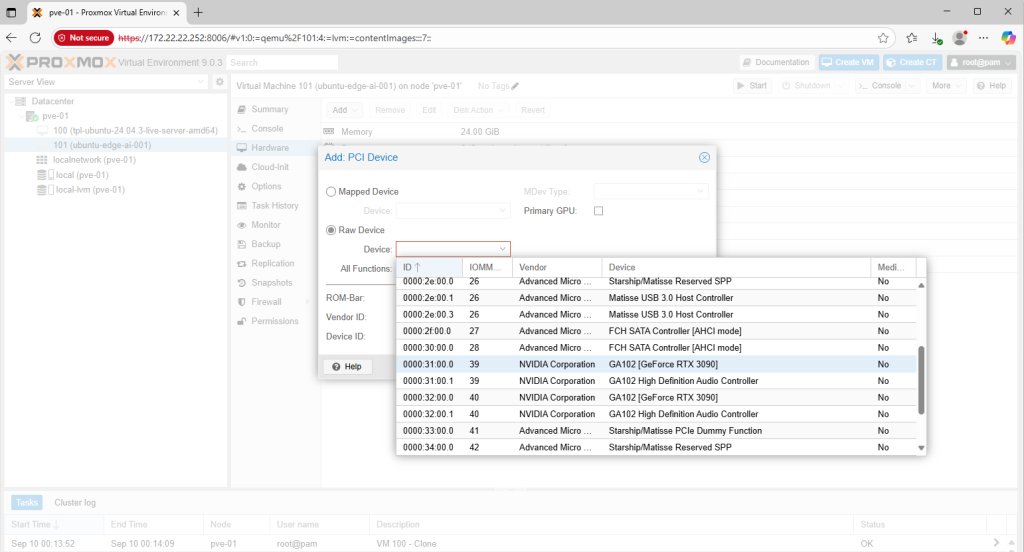
Attach the Two GPUs after the VM is created:
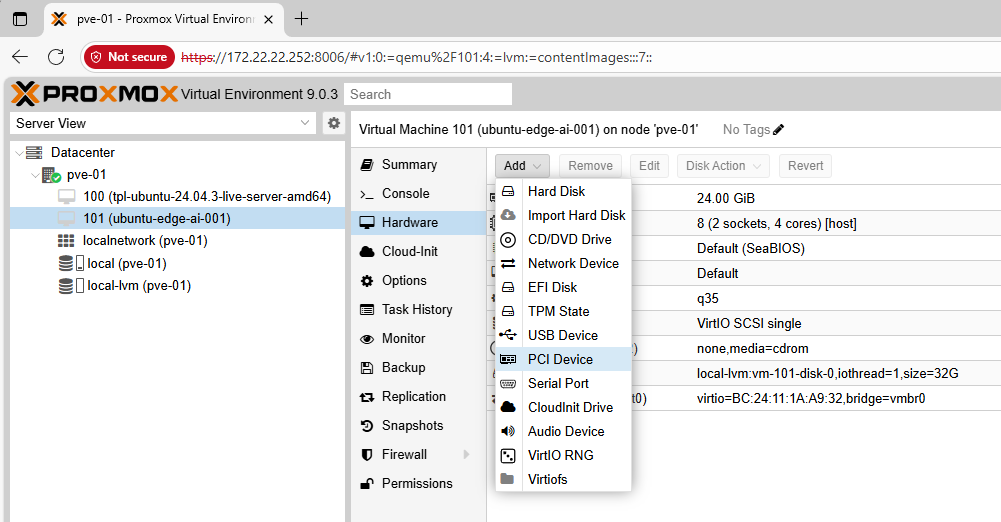
- VM → Hardware → Add → PCI Device
- Select
31:00.0(first GPU), check All Functions and PCI‑Express - Add another PCI device
32:00.0(second GPU), check All Functions and PCI‑Express - (Optional) If this VM will drive a monitor, tick Primary GPU
This automatically pulls the .1 audio functions for each GPU.
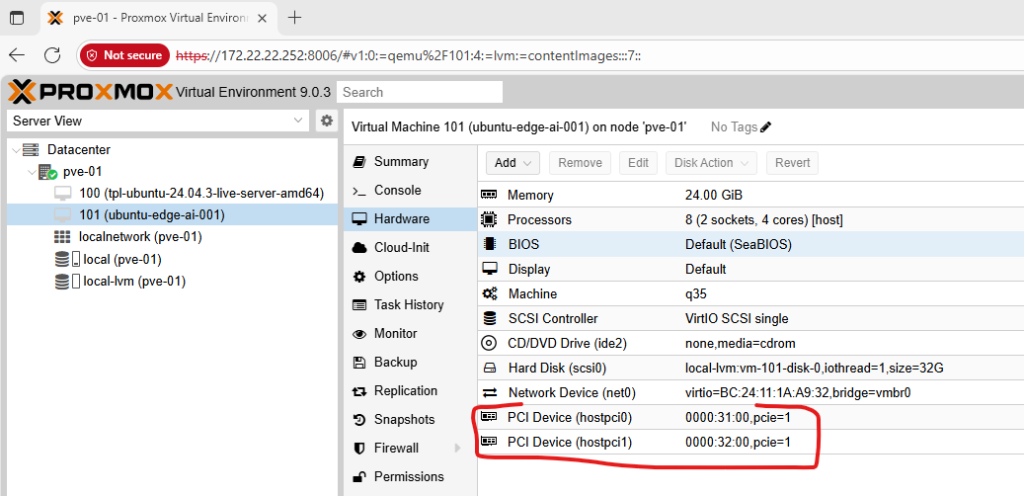
Direct Config File (alternative)
Edit /etc/pve/qemu-server/<VMID>.conf (example VMID 101):
machine: q35
bios: ovmf
cpu: host
hostpci0: 31:00,pcie=1
hostpci1: 32:00,pcie=1
# If you prefer explicit functions:
# hostpci0: 31:00.0,pcie=1
# hostpci1: 31:00.1,pcie=1
# hostpci2: 32:00.0,pcie=1
# hostpci3: 32:00.1,pcie=1
Here’s my current config (ignore the CPU and memory settings for now) – the only thing I care about at this stage is seeing the GPUs inside the VM. I’ll fine-tune the resources later this week when I start loading open-source AI models.
root@pve-01:~# cat /etc/pve/qemu-server/101.conf
boot: order=scsi0;ide2;net0
cores: 4
cpu: host
hostpci0: 0000:31:00,pcie=1
hostpci1: 0000:32:00,pcie=1
ide2: none,media=cdrom
machine: q35
memory: 24576
meta: creation-qemu=10.0.2,ctime=1757455146
name: ubuntu-edge-ai-001
net0: virtio=BC:24:11:1A:A9:32,bridge=vmbr0
numa: 0
ostype: l26
scsi0: local-lvm:vm-101-disk-0,iothread=1,size=32G
scsihw: virtio-scsi-single
smbios1: uuid=095969e7-3ad5-47fe-a2c2-3874c2da38af
sockets: 2
vmgenid: b49b626a-50c6-44e6-b6a8-fc3e21ef1697
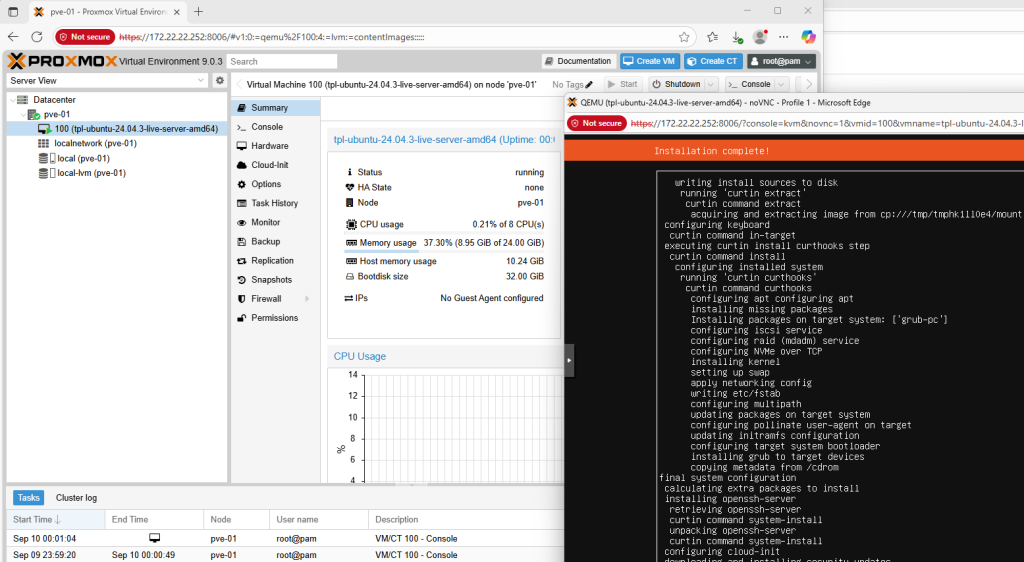
5) Install NVIDIA Drivers Inside the Ubuntu VM
- Boot the VM from an Ubuntu ISO (22.04/24.04 LTS).
- After install, add NVIDIA drivers:
sudo apt update
sudo ubuntu-drivers autoinstall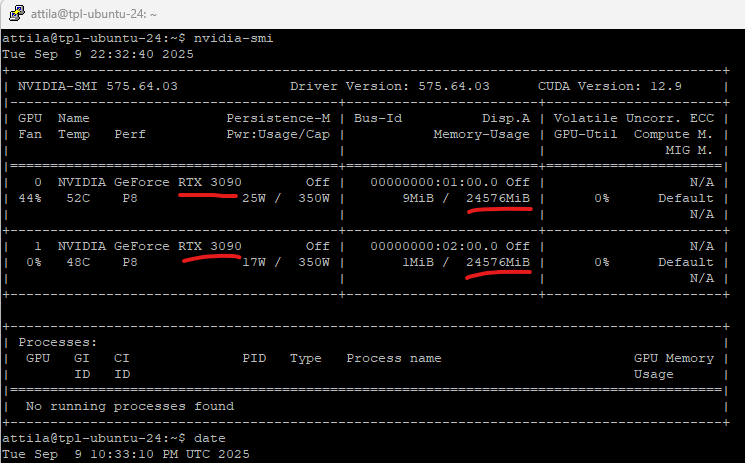
sudo reboot- Confirm both GPUs are visible:
attila@tpl-ubuntu-24:~$ nvidia-smi
Tue Sep  9 22:32:40 2025
+-----------------------------------------------------------------------------------------+
| NVIDIA-SMI 575.64.03              Driver Version: 575.64.03      CUDA Version: 12.9     |
|-----------------------------------------+------------------------+----------------------+
| GPU  Name                 Persistence-M | Bus-Id          Disp.A | Volatile Uncorr. ECC |
| Fan  Temp   Perf          Pwr:Usage/Cap |           Memory-Usage | GPU-Util  Compute M. |
|                                         |                        |               MIG M. |
|=========================================+========================+======================|
|   0  NVIDIA GeForce RTX 3090        Off |   00000000:01:00.0 Off |                  N/A |
| 44%   52C    P8             25W /  350W |       9MiB /  24576MiB |      0%      Default |
|                                         |                        |                  N/A |
+-----------------------------------------+------------------------+----------------------+
|   1  NVIDIA GeForce RTX 3090        Off |   00000000:02:00.0 Off |                  N/A |
|  0%   48C    P8             17W /  350W |       1MiB /  24576MiB |      0%      Default |
|                                         |                        |                  N/A |
+-----------------------------------------+------------------------+----------------------+

+-----------------------------------------------------------------------------------------+
| Processes:                                                                              |
|  GPU   GI   CI              PID   Type   Process name                        GPU Memory |
|        ID   ID                                                               Usage      |
|=========================================================================================|
|  No running processes found                                                             |
+-----------------------------------------------------------------------------------------+
attila@tpl-ubuntu-24:~$ date
You should see two RTX 3090 entries with 24 GB VRAM each.
(Optional) CUDA & Containers – I’ll save this for my next blog article, not for today.
Performance Tips (Nice‑to‑Have)
- CPU pinning: Pin vCPUs to physical cores for the AI VM and isolate those cores from the host (tune with
isolcpus& Proxmox CPU pinning). - Hugepages: Enable 1G/2M hugepages for lower overhead on memory‑intensive training.
- NUMA awareness: If you’re on a multi‑socket board, align vCPUs and memory to a single NUMA node.
- Disk layout: Keep the AI dataset on fast NVMe; put lab VMs on separate storage to avoid contention.
The Triple‑Boot Plan (Why I Keep It)
- Windows 11: video editing and occasional co‑op games with my boys
- Native Ubuntu: raw, bare‑metal runs for maximum performance experiments
- Proxmox VE: the main daily environment because I need the rest of the cores and RAM for lab VMs; only one giant Ubuntu VM gets both GPUs for AI
This gives me the best of all worlds without compromising on privacy or flexibility.
Troubleshooting Cheatsheet
- Installer hangs at boot: add
nomodesetat the boot menu (both Proxmox installer and first boots if needed). - GPUs not isolated in IOMMU groups: move cards to different slots; if still grouped, use
pcie_acs_override=downstream,multifunction(lab only). - VM won’t start after attaching GPUs: ensure
OVMF+q35, tick PCI‑Express, and checkjournalctl -xefor VFIO errors. - Windows guests show Code 43: set
cpu: host,hidden=1, keep OVMF/UEFI, use recent NVIDIA drivers. - Black screen in guest: keep a temporary
VirtIO-GPUdisplay until NVIDIA drivers are installed, or attach via SSH.
What’s Next
With Proxmox in place and 2× RTX 3090 successfully passed through to an Ubuntu VM, I can run private edge models at home with near bare‑metal performance.
In the next article, I’ll walk through how I installed and configured AI models (LLMs, vision, and embeddings) in both virtualized and bare‑metal Ubuntu — and how I had unlimited fun with my private edge AI without relying on the cloud.